Columns in a FlatList
Published On: 2024-09-09
Posted By: Harish
We have seen a way to add a header and a footer to a FlatList. Like header and footer, sometimes we may need to add columns to a list. In those cases, we can use numColumns prop to create multiple columns in a FlatList
This numColumns prop accepts a boolean value which represents the number of columns of that FlatList.
Let's check the column prop with an example.
Create A New Project
Create a new react-native project by using npx. Check documentation for creating a new react native project.
npx react-native@latest init FlatListRN
Example Implementation
We will create a simple FlatList and make that list into three columns.
Import FlatList from react-native and add to App.tsx file. You can find more info about a basic FlatList by visiting FlatList with a basic example post.
//App.tsx
...
import { FlatList } from 'react-native';
...
<FlatList
  contentContainerStyle={styles.content_container}
  data={data}
  keyExtractor={item => item + ""}
  renderItem={({ item }) => {
    return (
      <Item item={item} />
    )
  }}
/>
...
If we run the app now,
#for Android
npx react-native run-android

#for ios
npx react-native run-ios
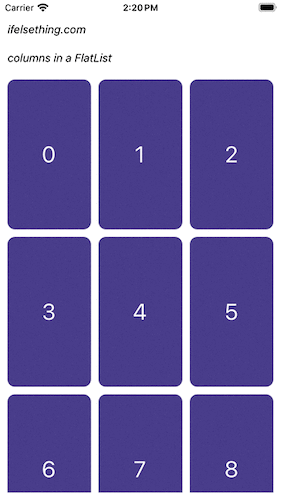
We will see a simple blocks list.
Now, add numColumns prop to the FlatList with value 3. It means we want to create a three columned list.
...
<FlatList
  ...
  numColumns={3}
/>
...
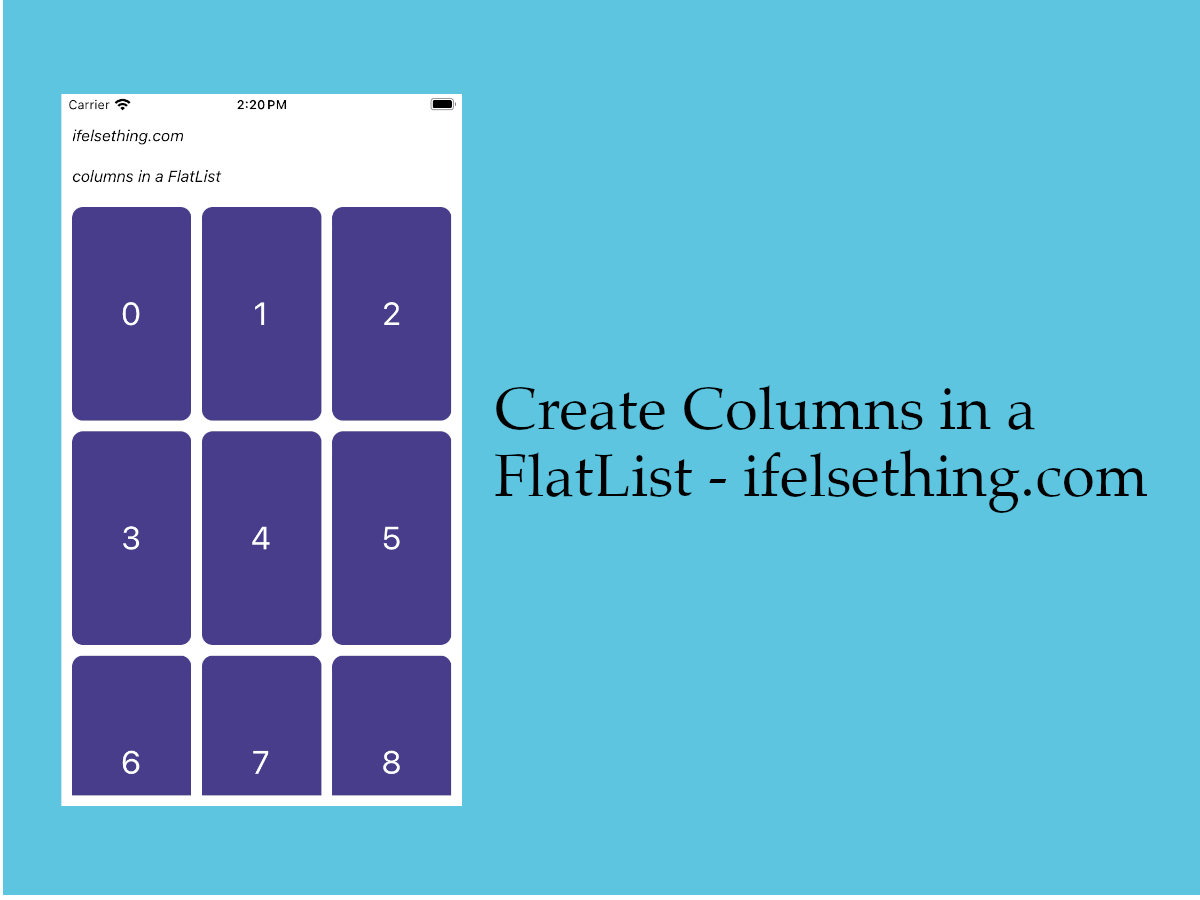
Now re-run the app to see a list with three columns.
ColumnWrapperStyle
When using columns in a FlatList, we can use columnWrapperStyle style prop to add styles to the columns inside the row container. This is similar to contentContainerStyle prop of FlatList, which applies styles to content of the FlatList container.
Like in our example list, when using numColumns prop, there is no gap between the column contents of rows, so to apply a gap between adjacent columns, we used columnWrapperStyle style prop.
...
<FlatList
  ...
  numColumns={3}
  columnWrapperStyle={{ gap: 10 }}
/>
...
If the list size is not evenly divided with the number of columns, odd items will evenly stretch to take up the remaining space of the row.
In our example, we created eleven blocks and split them into three columns. Here, nine items will be shown in three columns but the remaining two will take extra space left by the absence of the third item and become a two column row. Check below gif.
Complete code of our example,
//App.tsx
import React from "react";
import {
  Text,
  StyleSheet,
  SafeAreaView,
  StatusBar,
  View,
  FlatList
} from "react-native";

export default function App() {

  const data = [...Array(11).keys()];

  const Item = ({ item }: { item: number }) => {
    return (
      <View
        key={item}
        style={styles.item_view}
      >
        <Text style={styles.item_text}>{item}</Text>
      </View>
    )
  };

  return (
    <SafeAreaView style={{ flex: 1, backgroundColor: 'white' }}>
      <StatusBar
        barStyle="dark-content"
      />
      <View style={styles.container}>
        <Text style={styles.text}>
          ifelsething.com
        </Text>
        <Text style={styles.text}>
          columns in a FlatList
        </Text>
        <FlatList
          contentContainerStyle={styles.content_container}
          data={data}
          keyExtractor={item => item + ""}
          numColumns={3}
          columnWrapperStyle={{ gap: 10 }}
          renderItem={({ item }) => {
            return (
              <Item item={item} />
            )
          }}
        />
      </View>
    </SafeAreaView>
  );
}

const styles = StyleSheet.create({
  container: {
    flex: 1,
    margin: 10,
    gap: 20
  },
  text: {
    fontSize: 15,
    color: 'black',
    fontStyle: 'italic'
  },
  content_container: {
    gap: 10
  },
  item_view: {
    flex: 1,
    height: 200,
    borderRadius: 10,
    backgroundColor: 'darkslateblue',
    alignItems: 'center',
    justifyContent: 'center'
  },
  item_text: {
    color: 'white',
    fontSize: 30,
  },
})
Related Posts
 Styling ScrollView Children React Native
 Scroll Programmatically in React Native
 Header and Footer for React Native FlatList
 Empty Data Component of VirtualizedList
 Get ScrollView Content Size in React Native
 Start Scroll from Different Position in React Native
 Cell Metrics in VirtualizedList
 Pull down to Refresh FlatList
 VirtualizedList in React Native